Diedrich (with sensor package) - Roasting Intelligence setup

Table of Contents
Overview
This article will help you connect your Diedrich roast machine with a pre-installed sensor package to Cropster Roasting Intelligence.
Requirements
- Sensor package (or Phidget 1048) pre-installed
- USB cable
Supported measurements
There are four different setups, each with its own set of supported measurements:
- 3-sensor-setup: Bean, Inlet, and Drum temperature
- 4-sensor-setup: Bean, Inlet, Drum, and Exhaust temperature
- 5-sensor-setup: Bean, Inlet, Drum temperature; Gas and Airflow
- 6-sensor-setup: Bean, Inlet, Drum, Exhaust temperature; Gas and Airflow
Locate the Phidget 1048
To accurately configure your Diedrich's connection in the Roasting Intelligence (RI), locate the Phidget device (or devices, for 5- and 6-sensor setups) inside the machine. The exact location may vary. For reference, refer to the images below.
Diedrich IR-5

Diedrich IR-12

Identify the temperature measurements
Next, we recommend that you identify and label the probes by measurement (e.g., Bean temp, Inlet temp, etc.). To do this, follow the cables for each probe from the tip of the probe to the end of the cable, where the probe connects to the Phidget. Once the Phidget has been located and labeled, we recommend taking pictures of the Phidget for later reference when establishing a connection to the machine.
Roasting Intelligence Setup
Install Roasting Intelligence
- Download Roasting Intelligence.
- Complete the installation process by following the steps provided.
- Double-click the Cropster icon on your desktop to start Roasting Intelligence.
- Click the green Login with the browser button.

- You will be directed to a login page in your browser. Enter your email and password and click the green Sign in with password button.
Use the same credentials that you use to access the online platform.
Establish a connection to the machine
Before configuring your roast machine, add it to your Cropster account, then follow the steps below.
- Select
 Preferences > Machine > Configuration
- To choose the Roast machine, click on the dropdown menu in the Machine section.
- Click the + Add connector option to choose your connector from the dropdown list.
- Select Temperature sensor (Ungrounded K/J/E/T-type thermocouples) from the dropdown.
- Click Select to add the connector.
.webp)
If you have the 5- or 6-sensor setup, also select Diedrich Gas and Airflow (Phidgets).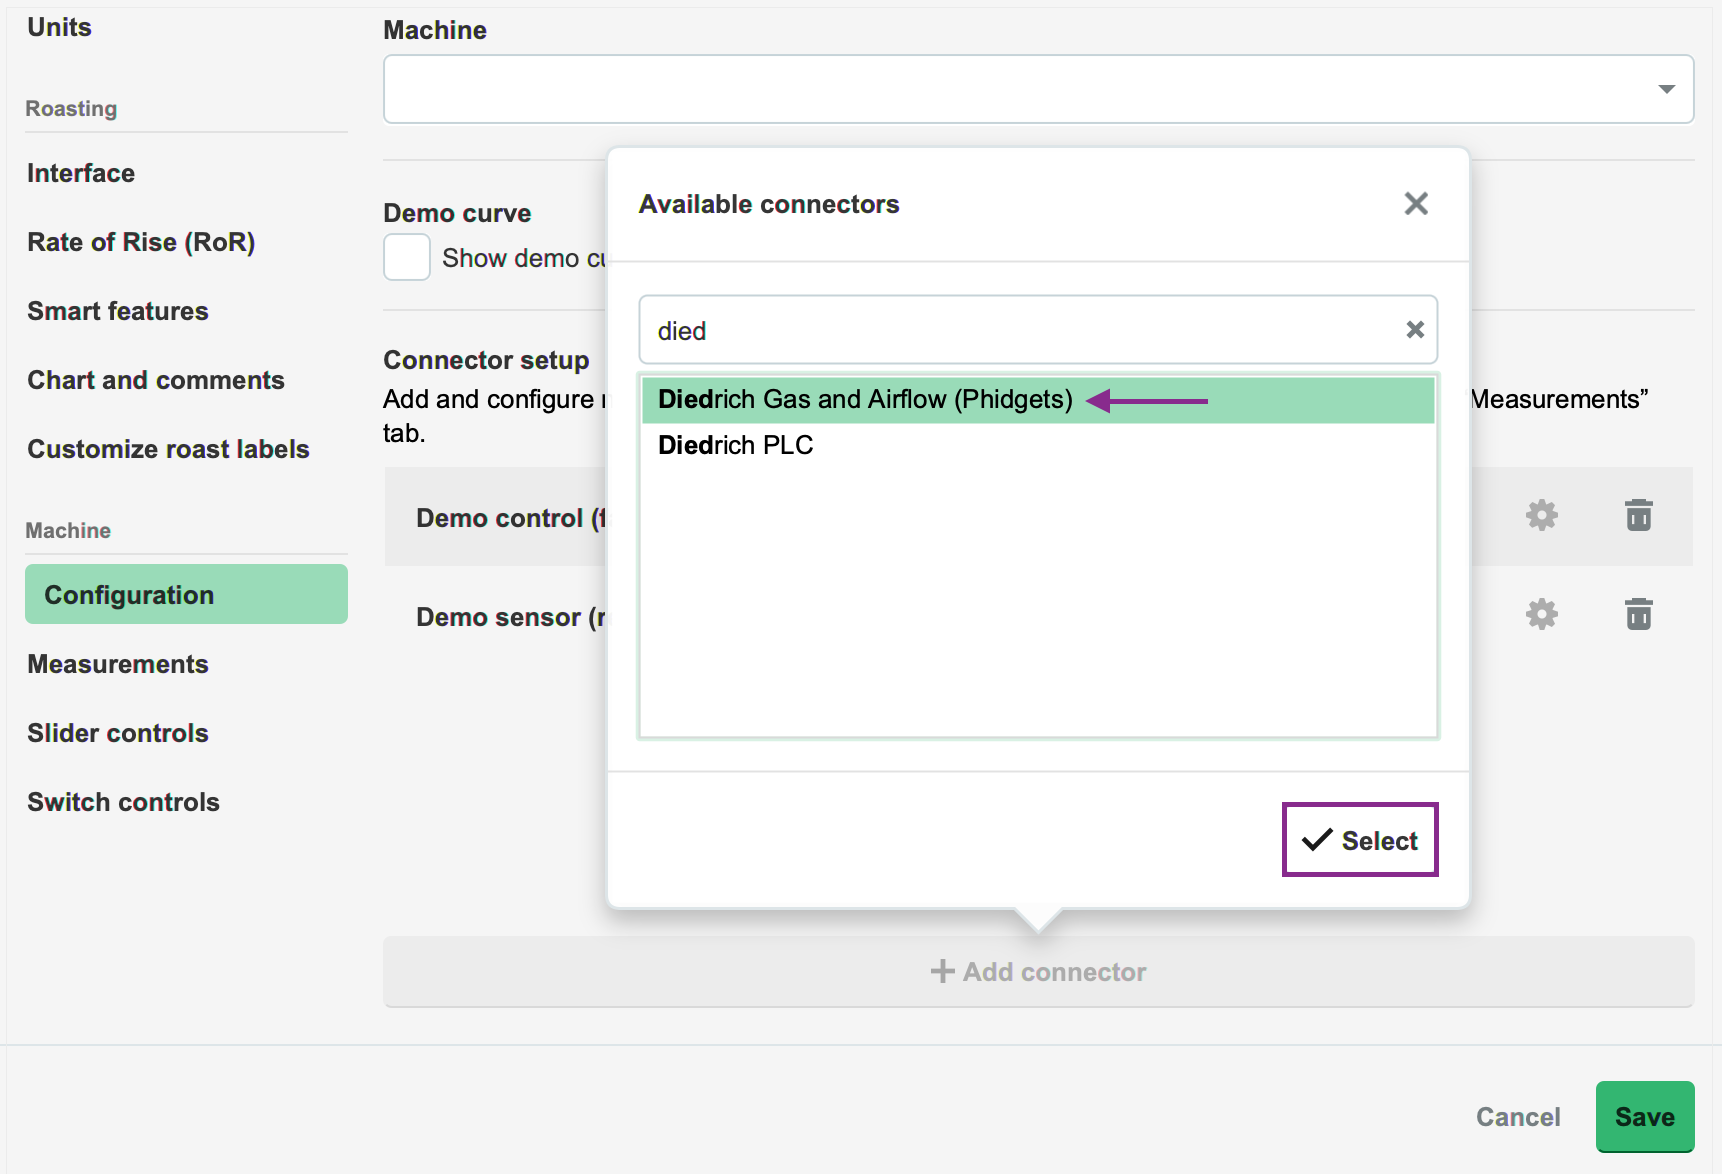
- Navigate to the Machine > Measurements tab. All supported measurements will be displayed.
- To activate the measurements, click the green toggle button.
- Enable the desired measurements and choose Temperature sensor (Ungrounded K/J/E/T-type thermocouples) as the connector type.
If you have the 5- or 6-sensor setup, choose Diedrich Gas and Airflow (Phidgets) from the dropdown menu for Gas and Airflow.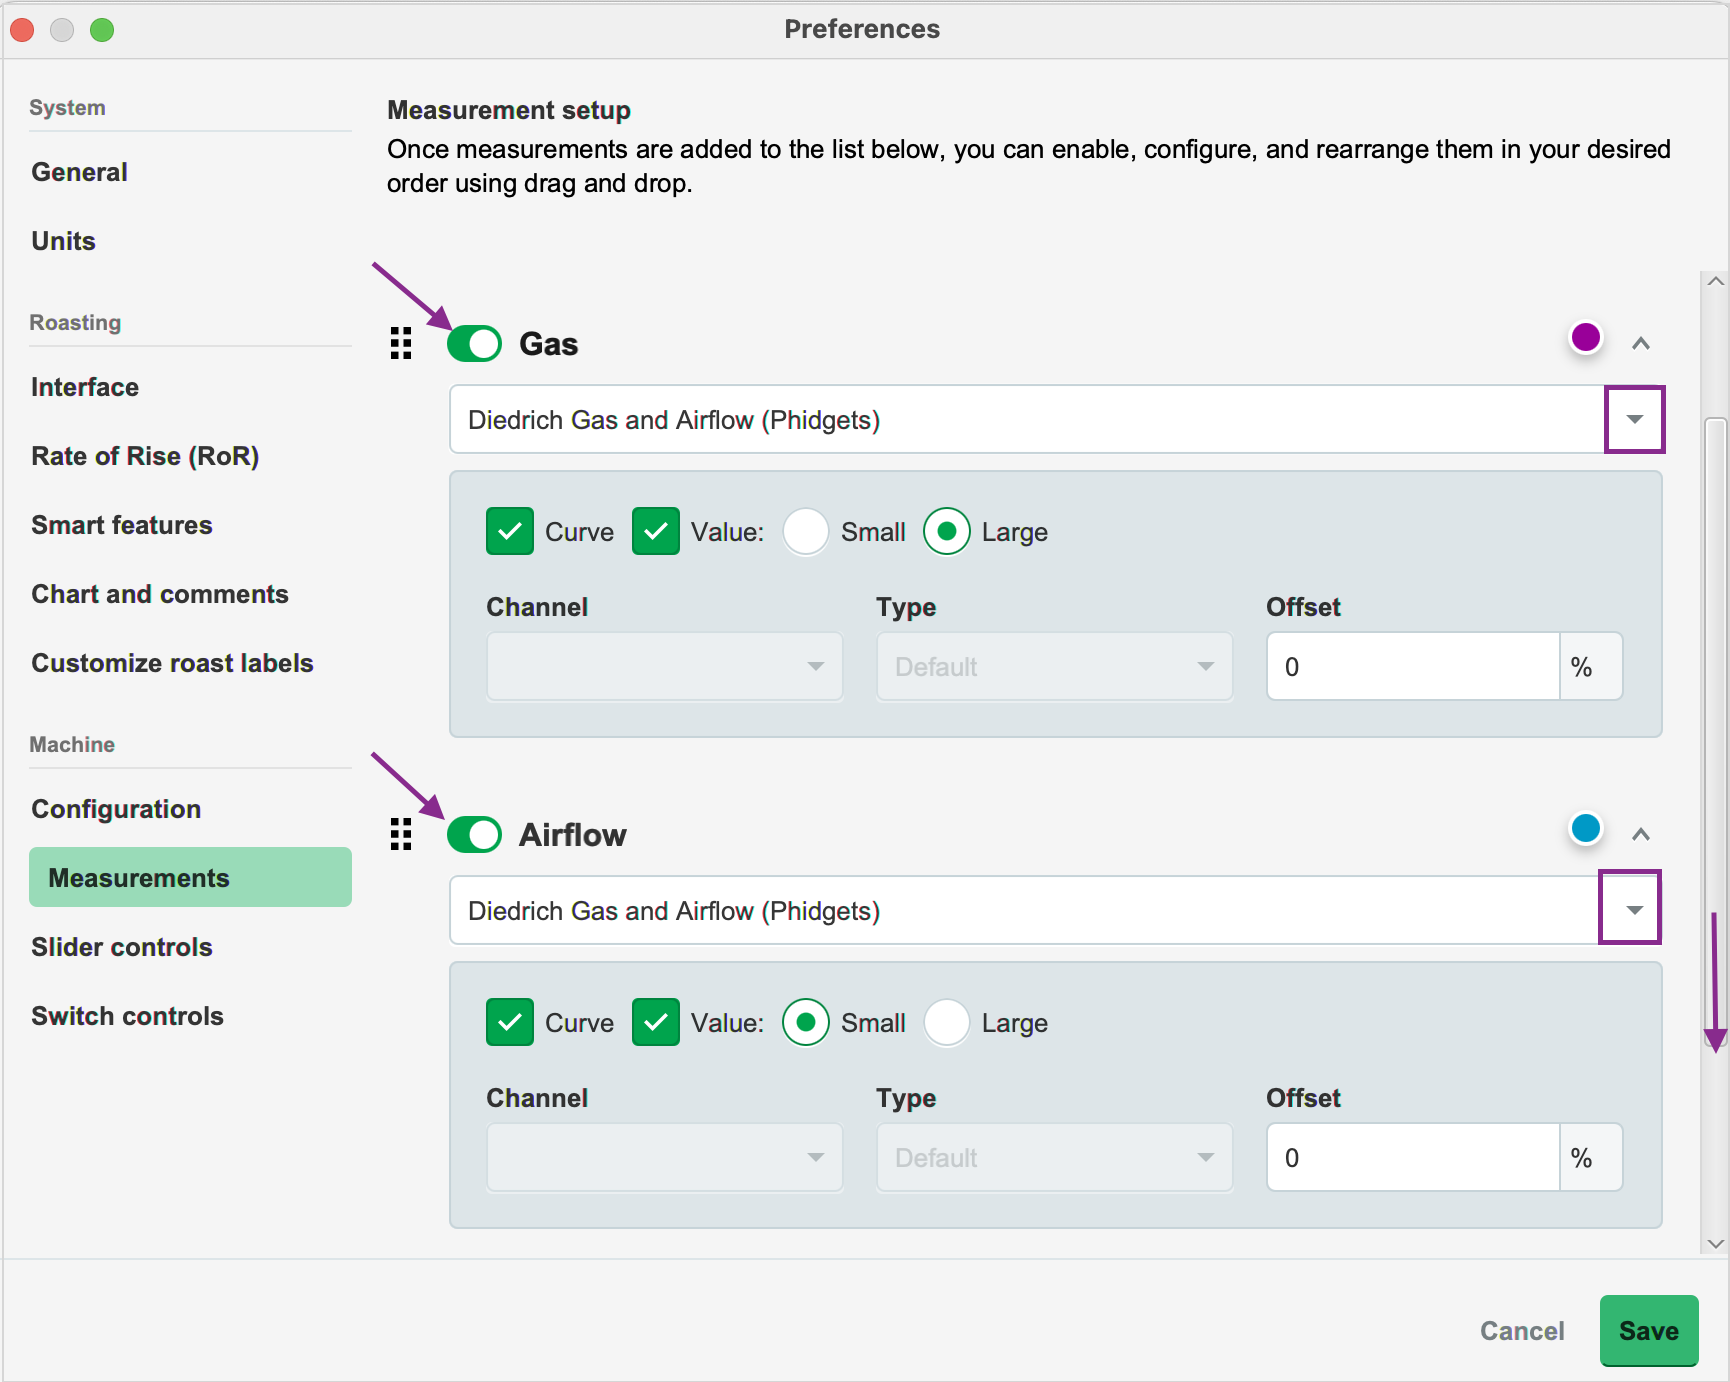
- (Optional) Change the order of the measurements by using the
-png.webp) Drag and Drop icon and move it into position.
Drag and Drop icon and move it into position..webp)
- Assign the correct channel for each temperature measurement. Refer to the section Identify the temperature measurements.
The channel refers to the ports on the Phidget 1048. If the probe wires are connected to port 1/G, select 1 under the channel. - Select K from the Type dropdown menu.
Note: Diedrich roast machines use K-type thermocouples by default. - Navigate to the Machine > Configuration tab and click on the Gear icon in the Connector setup section to open the gas pressure settings and select the appropriate option for your machine.
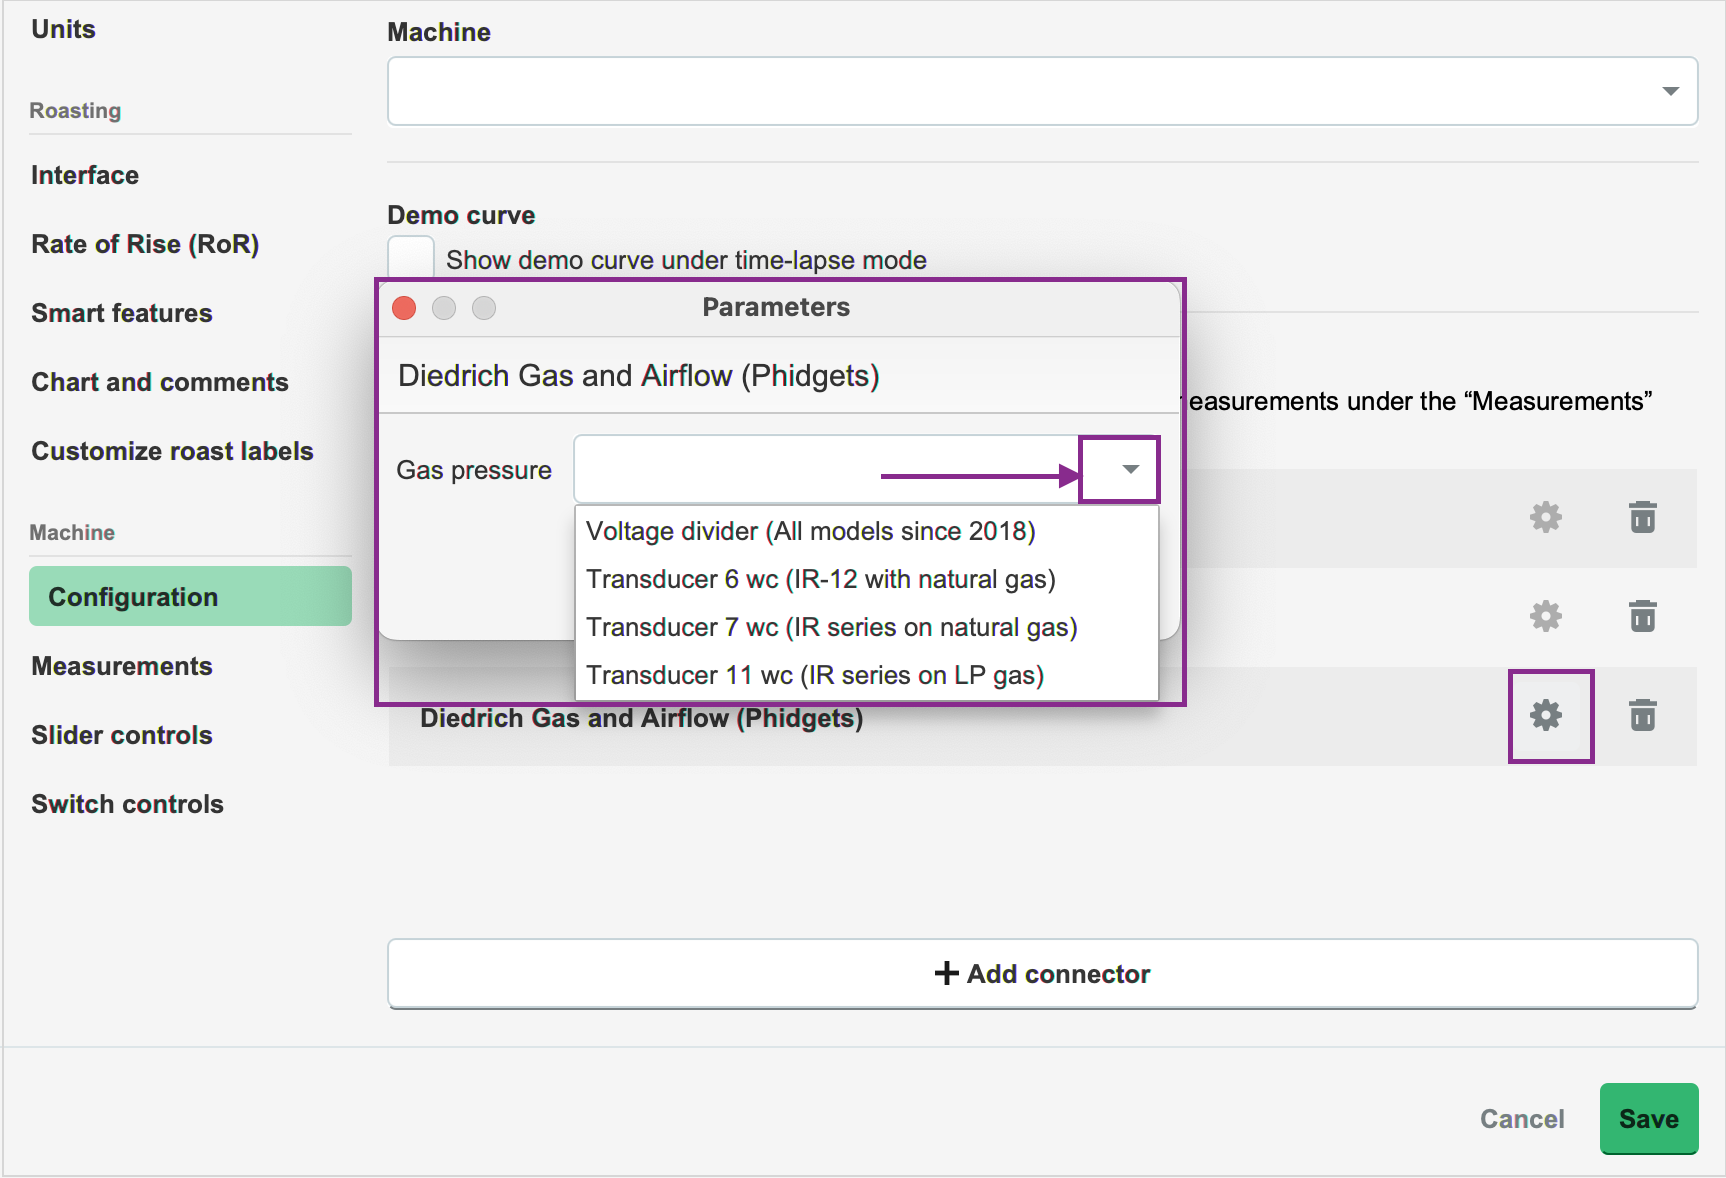
- Click OK.
- Click Save to finalize the changes.
Roasting Intelligence will automatically restart after saving the changes. If the setup was successful, you will be able to see temperature values on the right-hand side of the RI screen after the restart.

Note: Review this article to learn how to configure Roasting Intelligence preferences.
Troubleshooting
If RI indicates No source connected and/or you cannot see any measurements, please check the following:
- Is the Phidget 1048 connected to the computer?
- Is the Phidgets driver installed?
- Mac only: Has the Phidgets driver been enabled in the Mac's Security & Privacy settings?
If this does not help, submit a ticket to Cropster Technical Support, and our representatives will assist you.