Yoshan/Dongyi - Roasting Intelligence Setup

Table of Contents
Note: If you have a Yoshan/Dongyi YS model, with Omron controller and USB port, manufactured in 2023 or newer, please check this article for setup details.
Specifications
Requirements
- USB cable
-
Driver for the USB serial converter:
- Windows: CP210x Universal Windows Driver
- macOS: Mac OSX VCP Driver
⚠️ The driver may already be pre-installed with your operating system.
Supported measurements
- Bean temperature [°]
- Environmental temperature [°]
-
Exhaust temperature [°]: This option tracks the same values as the Environmental temperature and may be selected as an alternative option.
Setting up a connection
Via Bluetooth
-
Access your computer's Bluetooth interface.
- On macOS: Navigate to the Apple icon > System preferences > Bluetooth.
- On Windows: Go to Settings > Bluetooth & devices.
- Turn on Bluetooth, and connect to the device HC-0X (e.g., HC-06, HC-02).
- Input the match code 1234.
-
Proceed with the Roasting Intelligence setup.
Some computers may not be compatible with a Bluetooth connection, and alternatively, connect via a data cable.
Via data cable
- Turn on the power to the roast machine.
- Plug the data cable into the roast machine's communication port.
-
Connect the cable to the computer's USB port.

- Proceed with the Roasting Intelligence setup.
Roasting Intelligence Setup
Installing the Roasting Intelligence software
- Download Roasting Intelligence.
- Complete the installation process by following the steps provided.
- Double-click the Cropster icon on your desktop to access Roasting Intelligence.
-
Click the green Login with the browser button.
.webp)
- You will be directed to the C-sar browser.
-
Enter your email and password and click the green Sign in with password button.
Use the same credentials that you use to access the online platform C-sar.
Establishing a connection to the machine
Establishing a connection to the machine via the Generic Modbus over serial port connector
The images below are for reference and may vary slightly from your screen.
Important details to keep in mind:
- Before you start configuring your roast machine, ensure that you have added it via the online platform C-sar.
- Only click Save after you've completed all settings in Roasting Intelligence.
- Select
 Preferences > Machine > Configuration.
 - To choose the Roast machine, click on the dropdown menu in the Machine section.
- Click the + Add connector option to choose your connector from the dropdown list.
- Select Generic Modbus over serial port from the dropdown.
-
Click Select to add the connector.

- Click on the Gear icon in the Connector setup section to open and configure more settings.
-
Copy the settings as shown below, and select the Serial port and Temperature unit:
-
Serial port:
- Windows: Select COMx.
- MacOS: Select USBx.
- Temperature unit: Select Celsius or Fahrenheit according to the temperature unit displayed on the machine's temperature readouts.
- Leave the fields empty as they are.
-
Serial port:
- Click OK.
- Navigate to the Machine > Measurements.
- To activate the measurements, click the green toggle button. Enable the controls you wish to activate.
- Choose Generic Modbus over serial port as the connector type.
- (Optional) Change the order of the measurements by using the
 Drag and Drop icon and move it into position.
 -
Click Save.

-
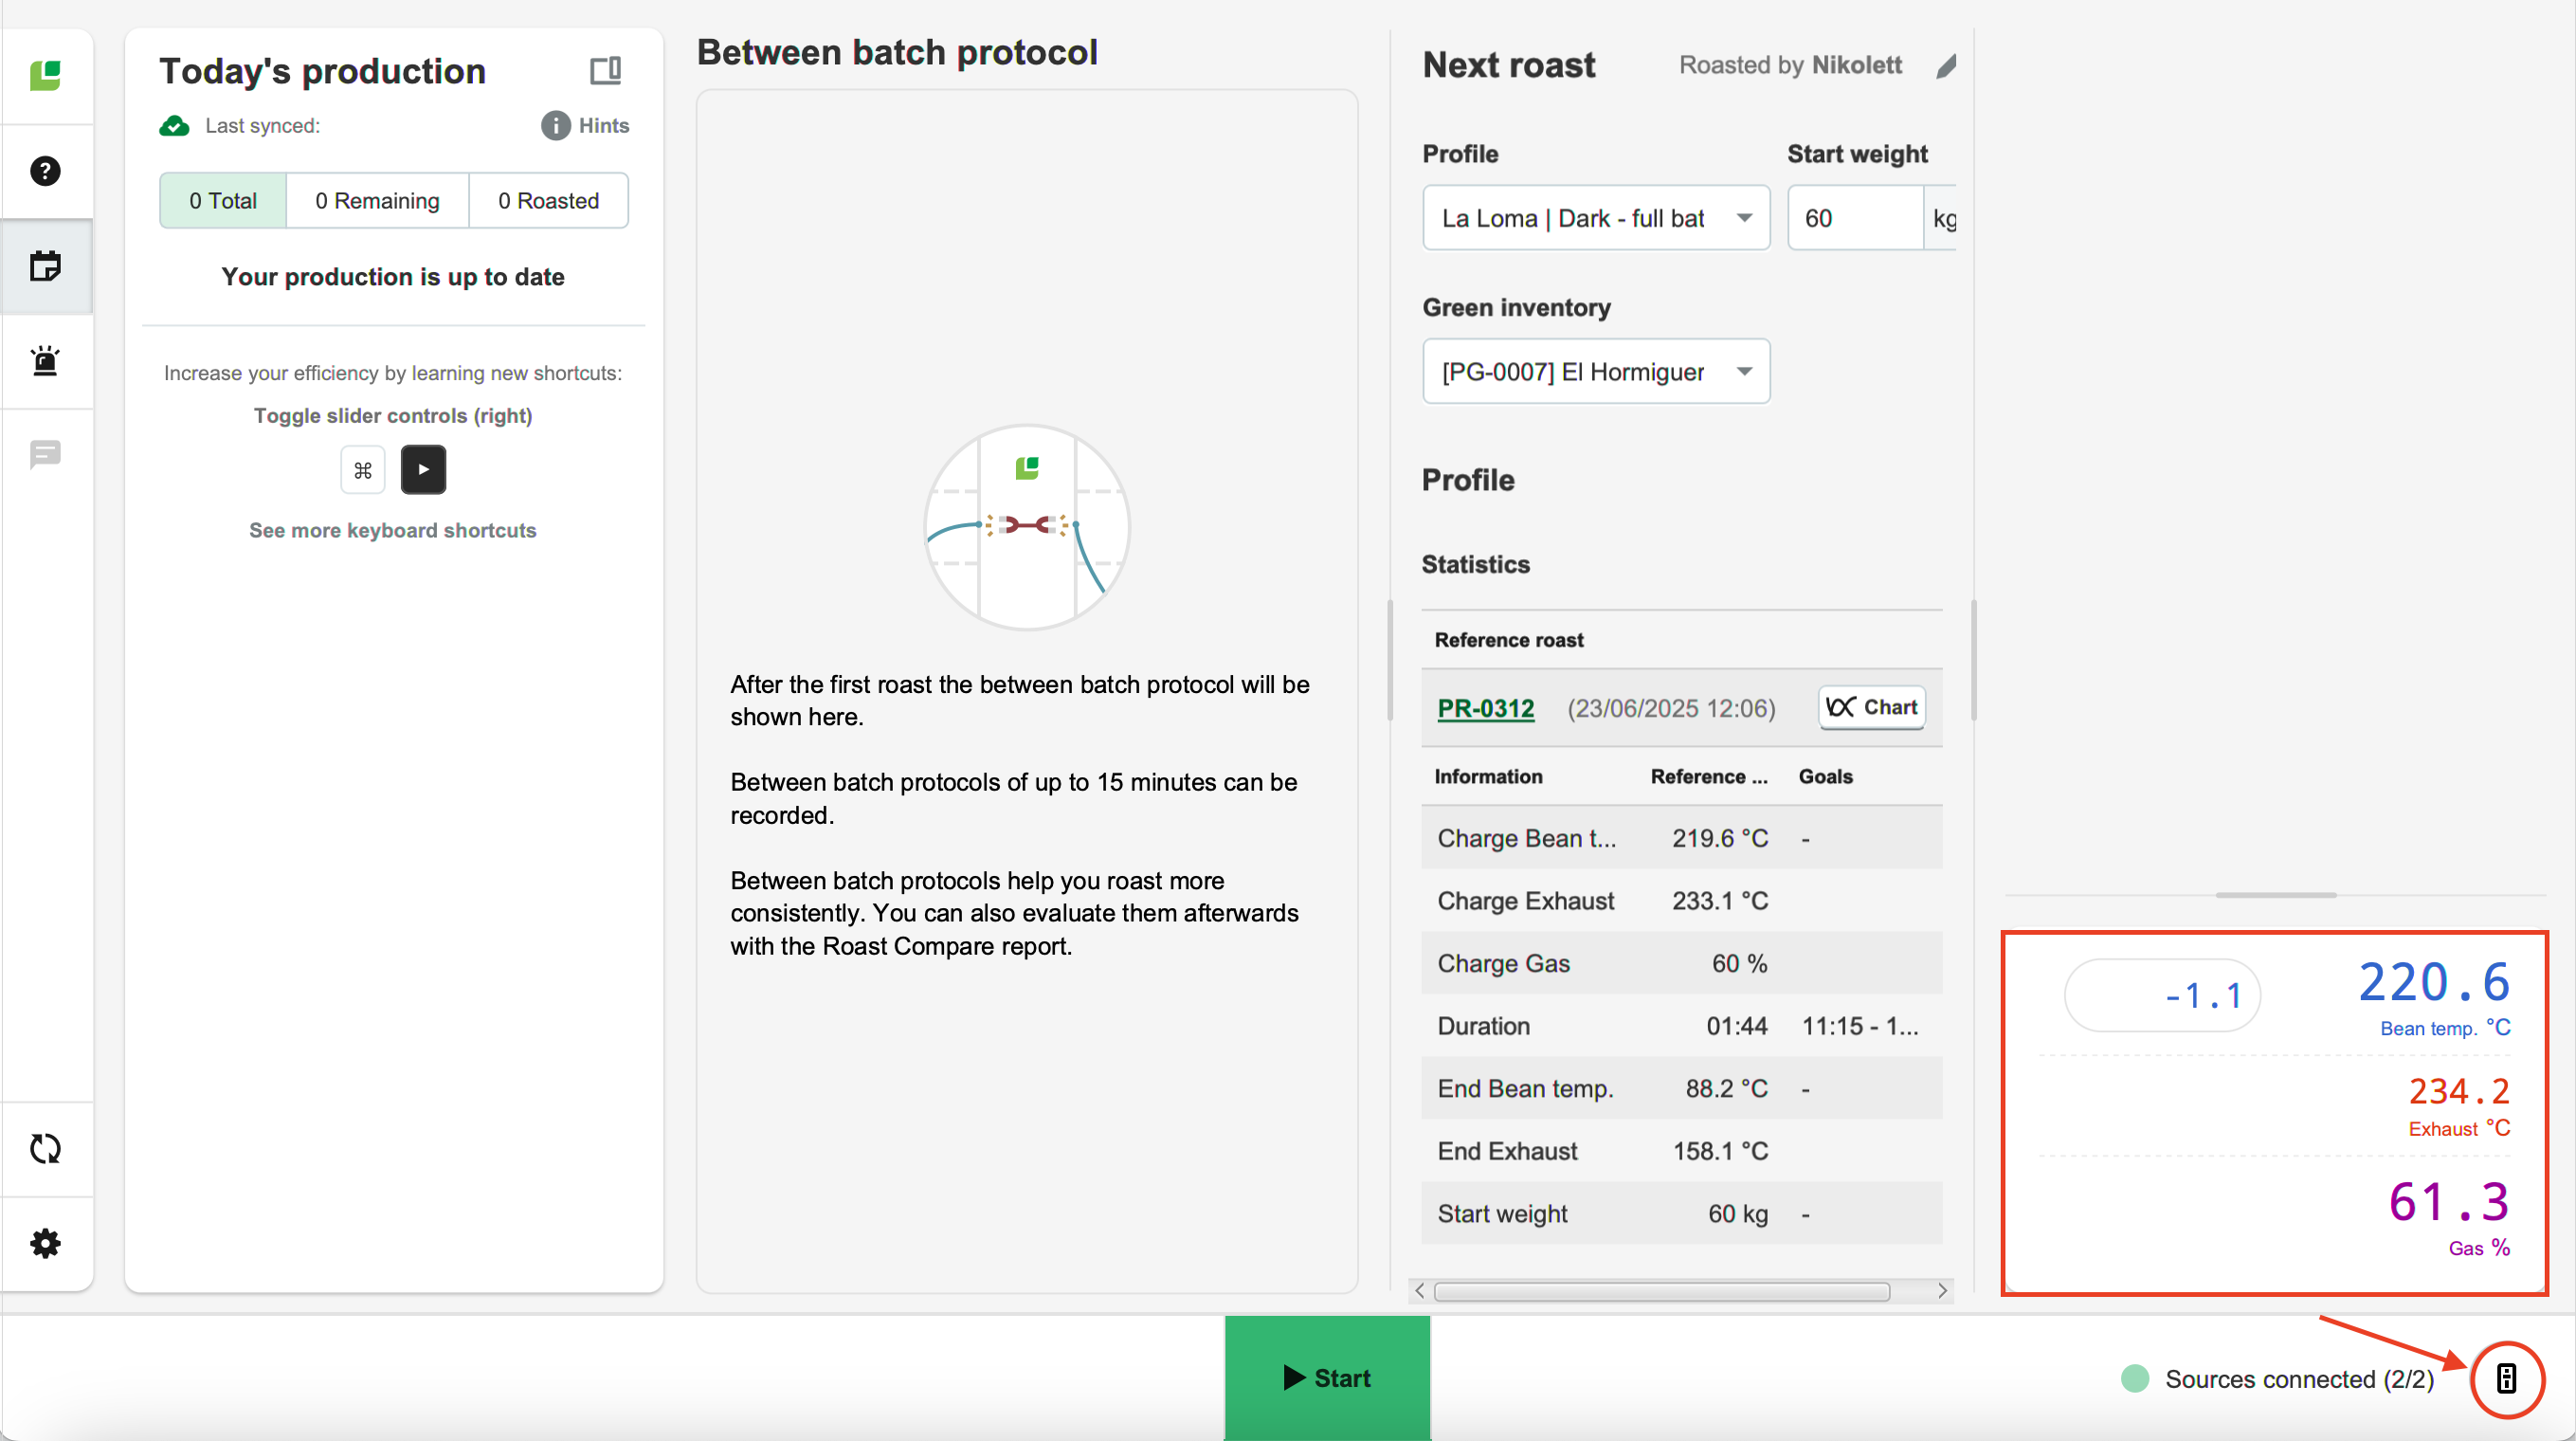
Restart Roasting Intelligence. If the setup was successful, you will see the temperature values displayed on the right-hand side of the screen following the restart.
Settings by Model Year
Before May 2017

After May 2017

Establishing a connection to the machine via Dongyi/Yoshan PIDs
If a connection cannot be established via the Generic Modbus over serial port protocol, you should connect using the Dongyi/Yoshan PIDs.
Important details to keep in mind:
- Before you start configuring your roast machine, ensure that you have added it via the online platform C-sar.
- Only click Save after you've completed all settings in Roasting Intelligence.
- SelectPreferences > Machine > Configuration.
- To choose the Roast machine, click on the dropdown menu in the Machine section.
- Click the + Add connector option to choose your connector from the dropdown list.
- Select Dongyi/Yoshan PIDs from the dropdown.
-
Click Select to add the connector.

- Click on the Gear icon in the Connector setup section to open and configure more settings.
-
Copy the settings as shown in the screenshot below, and select the Serial port and Temperature unit:
-
Serial port:
Windows: Select COMx.
MacOS: Select USBx. -
Version:
- Version 1: For models manufactured before May 2017
- Version 2: For models manufactured May 2017 onwards
- Temperature unit: Select the temperature unit shown on the roaster's display.
-
Decimal correction:
- 1/10: Divide value by 10.
- 1: No correction applied (Default).
- 10: Multiply value by 10.
-
Serial port:
-
Click OK.

- Navigate to the Machine > Measurements.
- To activate the measurements, click the green toggle button. Enable the controls you wish to activate.
- Choose Dongyi/Yoshan PIDs as the connector type.
- (Optional) Change the order of the measurements by using theDrag and Drop icon and move it into position.
-
Click Save.

- Restart Roasting Intelligence. If the setup was successful, you will see the temperature values displayed on the right-hand side of the screen following the restart.
Learn more about the Roasting Intelligence Preferences.
Troubleshooting
If Roasting Intelligence indicates No source connected and/or you cannot see any measurements, please check the following:
- Is the roast machine connected to the computer?
- Have you downloaded the driver for the USB serial converter?
- Is the correct Serial port selected?
Alternative configuration
If you are receiving Sources connected, and you have selected the Serial port referring to the connection of the roast machine, but you do not have any temperature measurements, try the following settings:
- Navigate to
.webp) Preferences > Machine > Configuration.
Preferences > Machine > Configuration. - Verify that the Roast machine you would like to connect from the dropdown menu (e.g., Yoshan YS-10) is still selected.
- By clicking on the + Add connector option, you can choose your connector from the available options in the dropdown list.
- You need to select Generic Modbus over serial port from the dropdown.
- Click Select to add the connector.
- Click on the Gear icon in the Connector setup section to open and configure more settings based on the manufacturing year, as shown below
-
Copy the settings as shown in the screenshot below, and select the Serial port and Temperature unit:
-
Serial port
- Windows: COMx
- MacOS: USBx
- Temperature unit: Choose Celsius or Fahrenheit according to the temperature unit displayed from the machine's temperature readouts.
-
Leave the empty fields as they are.

-
Serial port
- Click OK.
- Navigate to the Machine > Measurements tab. All supported measurements will be displayed.
- To activate the measurements, simply click the green toggle button.
- Switch on the measurements you would like to enable and select Generic modbus over serial port from the dropdown.
- (Optional) Change the order of the measurements by using theDrag and Drop icon and move it into position.
- Navigate back to the Machine > Configuration tab and click on the Gear icon in the Connector setup section to open and configure more settings based on the manufacturing year, as shown below
-
Copy the settings as shown in the screenshot below, and select the Serial port and Temperature unit:
-
Serial port:
Windows: Choose the COMx option that refers to the connection to the roaster.
Mac: Choose the USBx option that refers to the connection to the roaster. - Temperature unit: Choose Celsius or Fahrenheit according to the temperature unit displayed from the machine's temperature readouts
-
Serial port:
- Click Save to finalize the changes.
- Restart Roasting Intelligence. If the setup was successful, you will see the temperature values displayed on the right-hand side of the screen following the restart.
⚠️ If your machine shows as "Connected" (bottom-right) but you see no live temperature readings, you likely selected the wrong serial port in Roasting Intelligence. Double-check your settings to ensure you've picked the port specific to your machine.
The temperature decimal is in the incorrect location, or there are other connection issues
To solve these issues, you need to download the custom version of Roasting Intelligence depending on your computer's Operating System, here.
⚠️ Sign up via this form to begin using this version of Roasting Intelligence.
If you have further questions, feedback, or concerns, please submit a support ticket directly from support.cropster.com.