How to create a Post-roast blend
This article explains how to create a Post-roast blend profile and a Post-roast blend.
Table of Contents
What is a Post-roast blend?
Post-roast blending involves individually roasting green coffee beans before combining them, allowing for the creation of unique flavor profiles by mixing different roasted beans afterward.
Creating a new Post-roast blend profile
Post-roast blend Profiles require Profile groups.
By following the steps below, you can create a Post-roast blend recipe:
- Log in to the online platform C-sar.
- Navigate to Roasts on the main menu bar and select Post-roast blend Profiles.
-
Select the +Add blend profile button.

-
Enter the following information:
* indicates mandatory fields- *Name
-
Blend profile components
- Percentage (%): The sum of the percentages must total 100%.
- Weight (kg/lbs)
- Add your components (at least two) and enter their *Weight/Ratio.
-
Add as many components as you want by clicking on + Add component.

- Click Create blend profile to submit.
Creating a Post-roast blend
For efficient tracking of your production, you can oversee your Post-roast blends through the online platform C-sar.
By following the steps below, you can manually create a Post-roast blend:
- Log in to the online platform C-sar.
- Navigate to Roasts on the main menu bar.
- Switch to the Post-roast blends tab.
-
Click +Add blend.

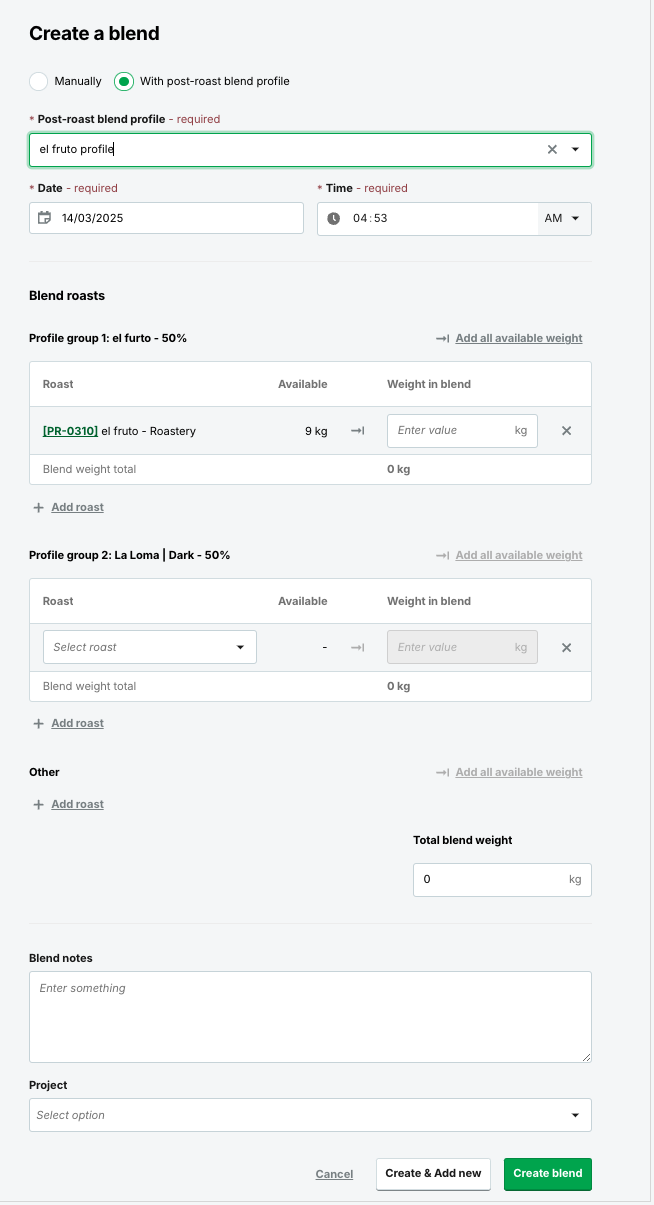
- You will be directed to the Create a Blend page, where you can create a blend manually or select a predefined Post-roast blend profile.
-
Selecting the Post-roast blend profile automatically populates all relevant fields.

-
If you blend manually, provide the following details:
* indicates mandatory fields- *Blend name
- *Date
- *Time
- *Roasts
- *Weight in blend
- Blend notes
-
Project

-
Click on Create & Add new or Create blend.
Clicking Create & Add New allows you to add more blends while remaining on the same page, whereas "Create blend" takes you to the Post-roast Blend tab in the Roasts overview page.
Post-roast blends will be stored under PB numbers (Production Blend) for easier searching, sorting, and integration into roastery processes.
FAQs
Is it possible to create a Post-roast blend with a date from the past, rather than the current date?
By following the steps below, you can easily create a Post-roast blend with a date from the past:
- Switch to the Post-roast blends tab on the Roasts overview page.
- Click the +Add blend button on the top right side of the page.
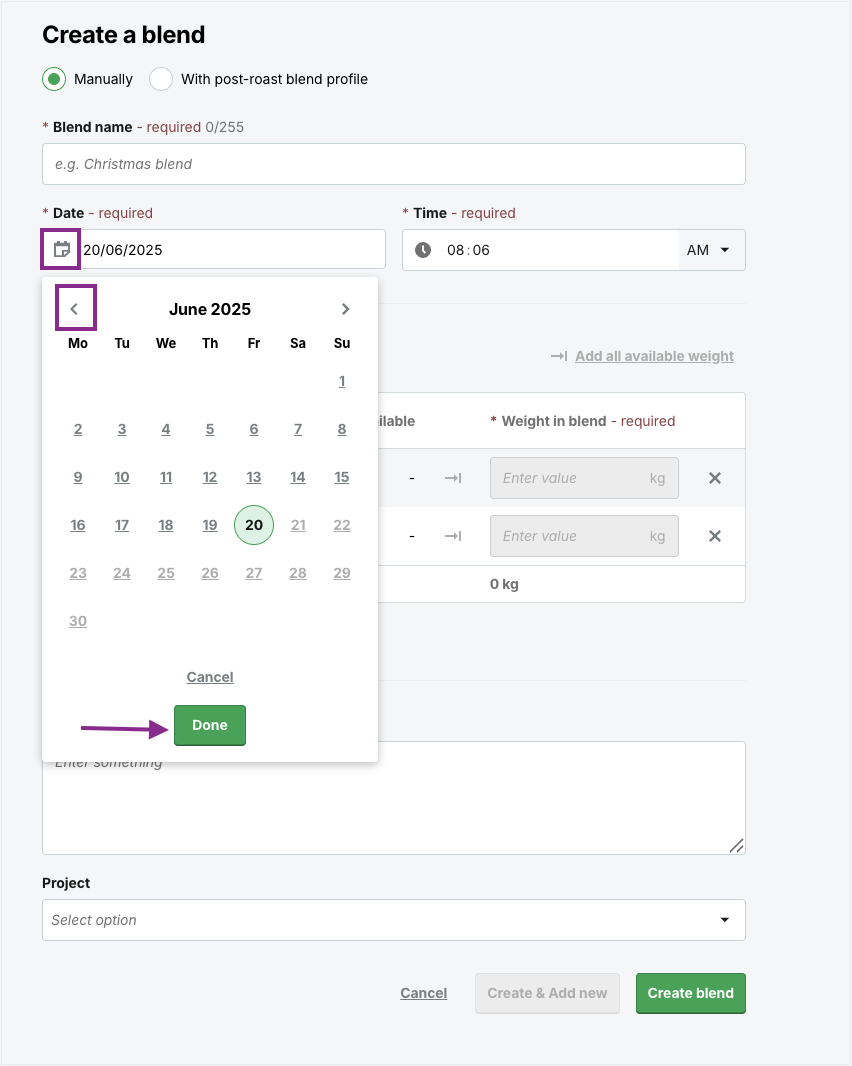
- Select the calendar icon next to the *Date field. Use the backward arrows to navigate to and select a previous date.
- Select the specific date you wish to use and click Done.
-
Complete the remaining required fields with the relevant information, then click the Create blend button.

Congratulations! You now know how to create a Post-roast blend.
Your opinion matters. If you have further questions, feedback, or concerns, please submit a support ticket directly from support.cropster.com.