
This manual explains how to connect your Fuji Royal Coffee Discovery roast machine to the Cropster Connector by establishing a splicing connection to your K type thermocouple.
Legal Note
Please read this installation and configuration guide carefully, as any mishandling could lead to permanent device damage.
Cropster explicitly does not recommend the hardware connection process outlined in this manual on roast machines with a software assisted profile and machine control system. Your Cropster support person will gladly recommend you different connection options for such machines.
By connecting a Cropster Connector or temperature probe to any computer or by installing Cropster’s Roasting Intelligence (RI) software, the user agrees to release Cropster from any liability and assumes any possible risk related to the use of this measuring device and/or software. Cropster's terms of service apply.
Specifications
Requirements
- Ungrounded digital thermocouples type K
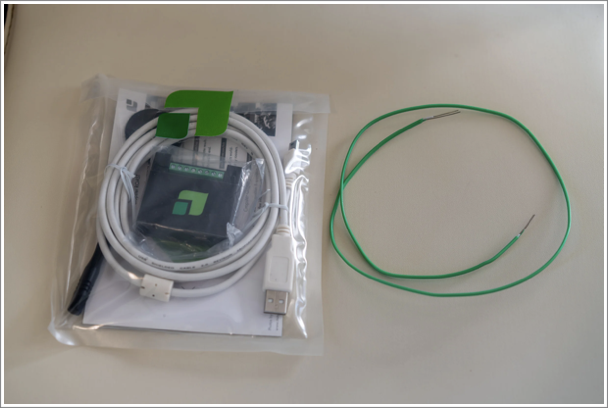
- Cropster Connector (=Phidget 1048)
- K-type splicing wire
Hardware installation
Disconnect the USB cable from the Cropster Connector and turn off your roast machine during the hardware installation.
Splicing wire installation
Warning: The following instructions only apply to models where one can unwire and wire the thermocouples without breaking connectors or other machine parts.
Before carrying out the procedure below, please wait until the machine has cooled down.
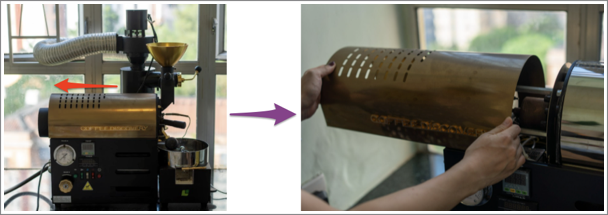
- Slide the machine's top panel, and remove it, as shown in the images below:
- Once removed, inside the roast machine, locate the thermocouple's internal connection (to the "TEMP" PID/readout).
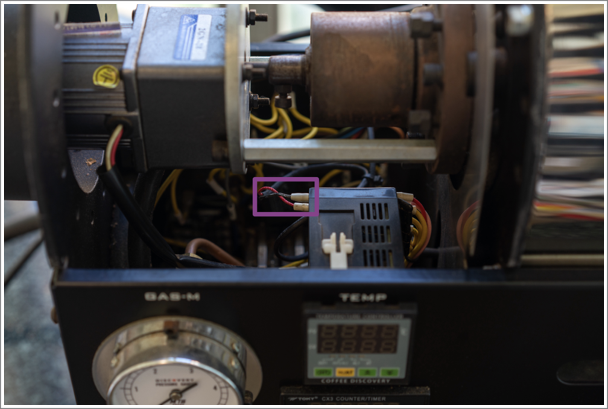
- Take out the temperature probe wires from where they are connected. Remember their position.
Hint: Take a picture before you disconnect the wires, so you can look up their position.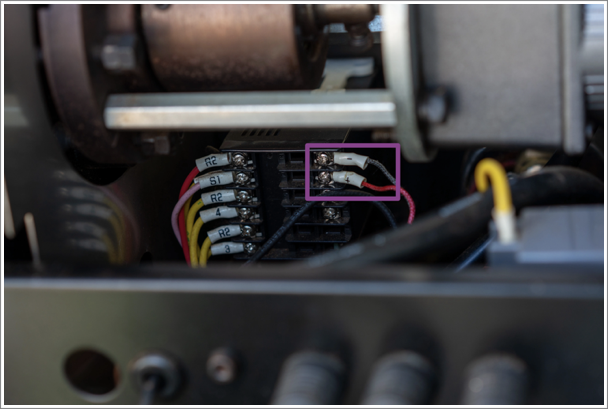
- Take the splicing wire, and twirl the ends of the wires firmly together with the thermocouple connectors by polarity.
Temperature probe wires (and splicing wires) look different depending on the standard your machine uses. In this example, international standard K-type splicing wire (green, and white), and K-type thermocouples (black, and red) are used, as specified by the manufacturer.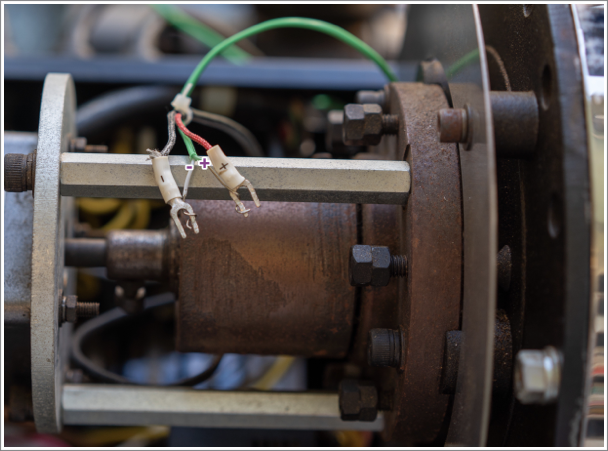
- Put the twirled ends back into the original position of the temperature probe connectors.
- Feed the free end of the splicing wire through the available orifice.
Cropster Connector installation
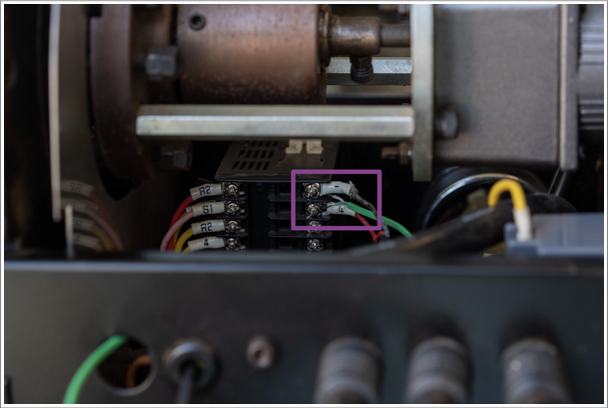
- Take the free end of the splicing wire, and connect the two wires to any port of the Cropster Connector (e.g. 0/G, 1/G, 2/G, 3/G) with the provided screw-driver.

- EURO-standard K-type (splicing wire):
- Green wire to number port (e.g. 0)
- White wire to corresponding G port
- EURO-standard K-type (splicing wire):
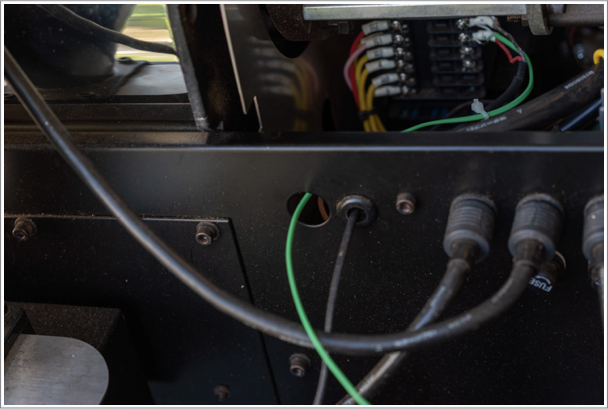
- Connect the Cropster Connector via provided USB cable and proceed with the Roasting Intelligence Setup.
Eventually, the connection will look similar as in the picture below.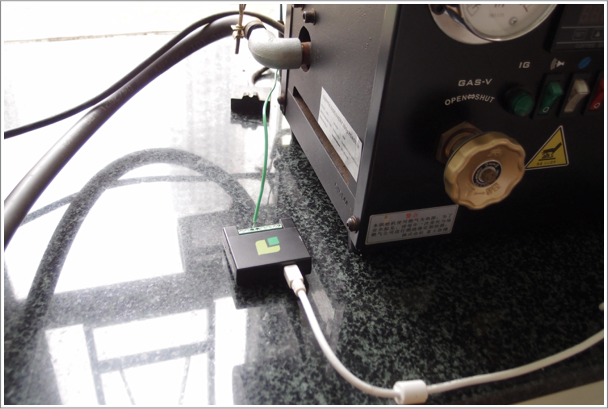
Do not attach, or place the Cropster Connector in, or onto any hot environment.
Roasting Intelligence (RI) Setup
Installing the Roasting Intelligence (RI) software
- Download the Roasting Intelligence from https://download.cropster.com/
- The Cropster installer leads you through all the installation steps.
- Download the Phidget driver.
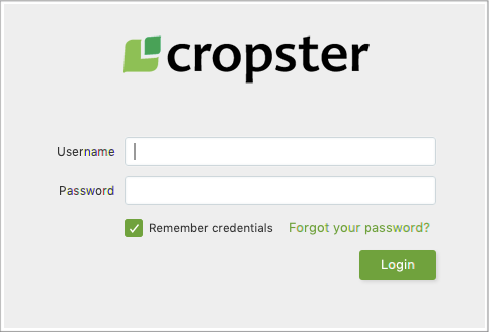
- Open the RI by double-clicking the Cropster icon on the desktop.
- Enter your username and password.
The username is the email address your Cropster invitation has been sent to, and use the password you've generated when accepting the invitation. - Check the Remember credentials box if you want to be able to run the RI offline.
- Click the Login button.
Establishing a connection to the machine
- Go to Account > Preferences > Machine tab.
- Select the Roast machine you would like to connect from the drop-down menu.
- Select Temperature sensor (Ungrounded K/J/E/T-type thermocouples) from the drop-down for all measurements connected to the Cropster Connector.
- Select the Channel.
The channel refers to the port on the Cropster Connector. If the probe wires are connected to port 1/G, select 1 under channel. - Select the thermocouple Type "K".
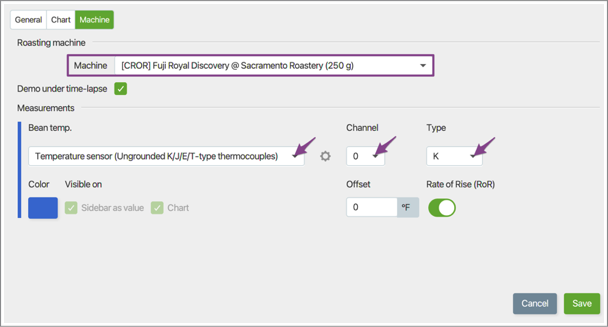
- Click Save to confirm the changes. The RI requires a restart to apply the settings.
If the setup was successful, you will be able to see temperature values on the right-hand side of the RI screen, after the restart.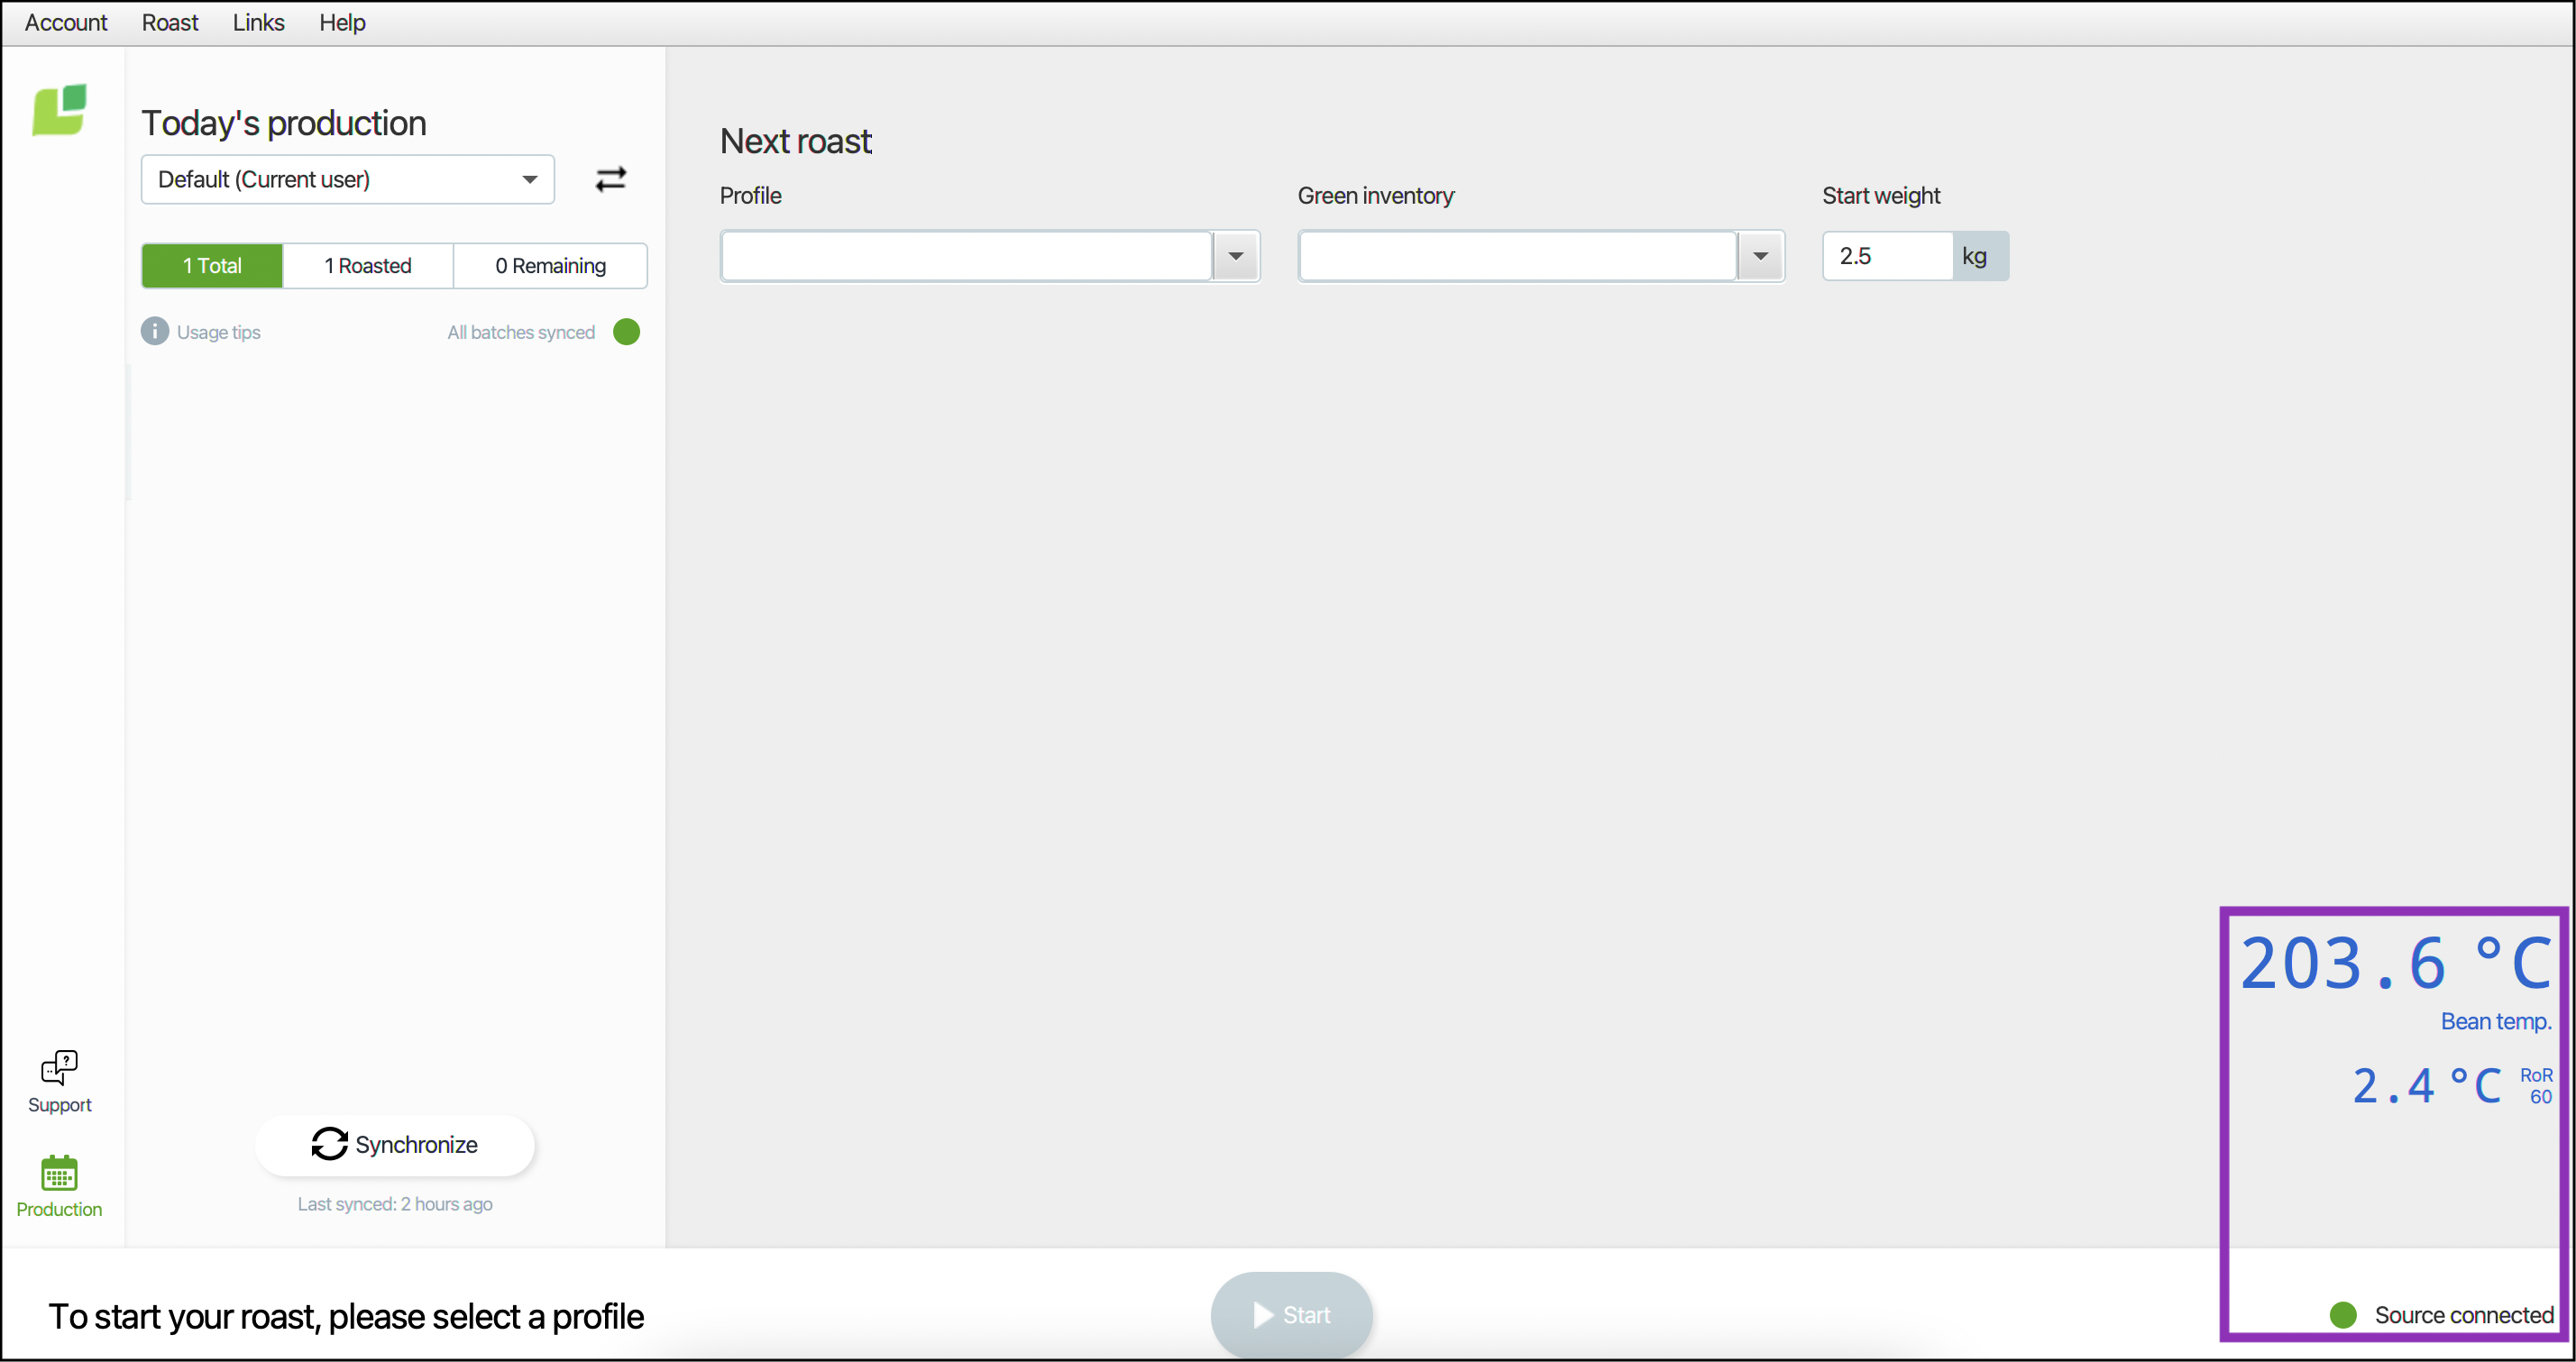
Learn how to customize your RI user preferences.
Troubleshooting
If the RI indicates No source connected and/or you cannot see any measurements, please check the following:
- Is the Cropster Connector connected to the computer?
- Is the Phidgets driver installed?
- Mac only: has the Phidgets driver been enabled in the Mac's Security & Privacy settings?
If Roasting Intelligence shows negative temperature readings you will have to swap the wires on the board from “G” to “0” (or 1, 2, 3) and the other way round.
 For further assistance, please create a support ticket by clicking the Support button in the left lower corner of the app. A Cropster support rep will get in touch with you.
Congratulations! You have successfully set up the Cropster Roasting Intelligence!
Check out our Getting started video and enjoy tracking your first roasts!
More manuals and videos can be found on help.cropster.com