How to transfer Samples to the (Green) Inventory
This article explains how to transfer one Sample and also Samples in bulk to the (Green) Inventory.

Table of Contents
Why transfer Samples to the Inventory?
Transferring ordered Samples to the Inventory ensures complete traceability of your lots.
Transferring Samples to the (Green) Inventory
There are two options to transfer Samples to the (Green) Inventory:
Transferring one Sample
By following the steps below, you can transfer one sample to the (Green) Inventory:
- Log in to the online platform C-sar.
- Navigate to Samples on the main menu bar. You will be directed to the Samples overview page.
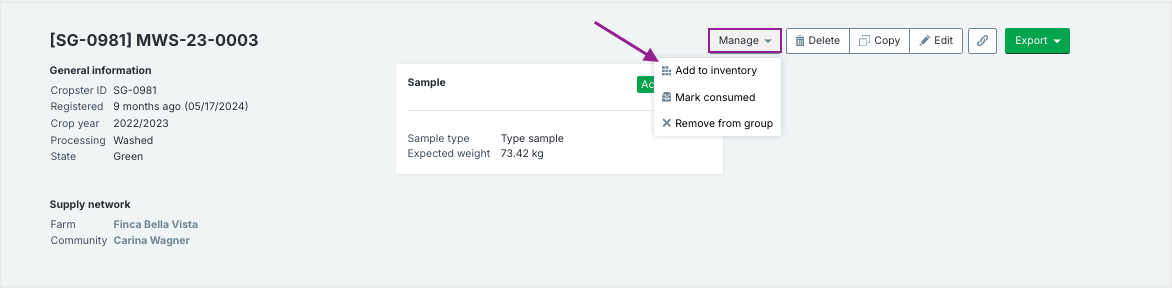
- Select the sample to add to the Inventory by clicking its SG tag to access the sample's details page.
-
Click on Manage > Add to inventory.
-
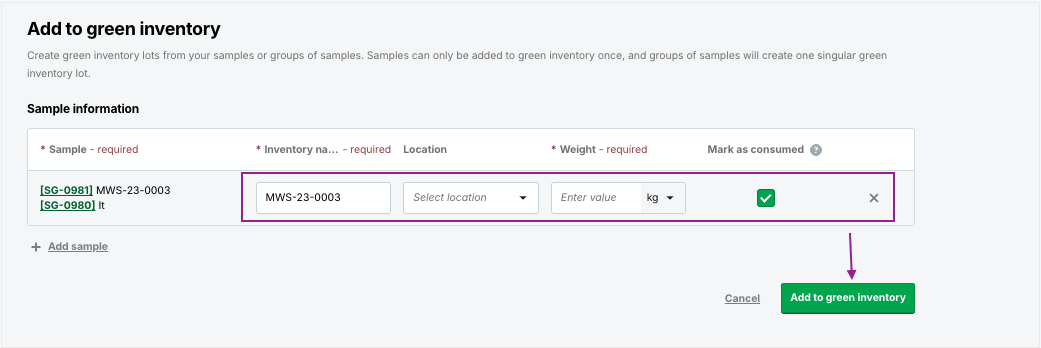
Enter the following details:
- Inventory Name
- Location: Select the location you want to register your Green Inventory for.
- Weight: The weight you want to add to your (Green) Inventory.
- (Optional) Check Mark as consumed if you want to mark the transferred samples as consumed.
-
(Optional) Click +Add sample to add more samples as needed, or click X to remove a sample from the list.
-
Click Add to Green Inventory.
Transferring Samples in bulk
By following the steps below, you can transfer samples in bulk to the (Green) Inventory:
- Log in to the online platform C-sar.
- Navigate to Samples on the main menu bar. You will be directed to the Samples overview page.
- Select the Samples to transfer by checking the respective boxes.
- Click Manage > Add to inventory. All samples within the selected group will be displayed in a comprehensive list.
-
Enter the following details:
- Inventory Name
- Location: Select the location you want to register your Green Inventory for.
- Weight: The weight you want to add to your (Green) Inventory.
- (Optional) Check Mark as consumed if you want to mark the transferred samples as consumed.
-
(Optional) Click +Add sample to add more samples as needed, or click X to remove a sample from the list.

- Click Add to Green Inventory.
Congratulations! You are now ready to transfer Samples to the (Green) Inventory.
Your opinion matters. If you have further questions, feedback, or concerns, please submit a support ticket directly from support.cropster.com.