
This article explains the potential causes and how to eliminate them when the Roasting Intelligence (RI) indicates "No sources connected".
 You have followed the machine setup manual and upon restart, Roasting Intelligence (RI) indicates No sources connected in the bottom right corner.
The two most common reasons for a failed connection is the physical connection itself or incorrectly set preferences.
Things to check first:
- Check the physical connection between your roast machine and computer. Make sure all cables are properly connected and intact.
- Repeat all steps in the setup manual you received from your Cropster contact person. Please check whether all settings have been copied over to the RI correctly.
If the connection issues are still persistent, please go to the section that refers to the connection type of your roast machine for more in depth troubleshooting steps:
Cropster Connector or Phidgets
If your roast machine is connected by the help of a Cropster Connector (Phidgets), one of the following reasons might apply:
- Incorrect or outdated Phidgets driver
- Phidgets driver is blocked by system (MacOS only)
- Other temperature logging system is running
Incorrect or outdated Phidgets driver
The Cropster Connector (Phidgets) requires a driver to work. Make sure you run the latest driver available for your operating system.
- Go to https://www.phidgets.com/docs/Phidgets_Drivers and download the latest driver for your operating system.
- Follow the installation steps.
- Disconnect the Phidgets from the computer and reconnect it.
- Open the Roasting Intelligence (RI).
MacOS 10.13+ only: Enable the Phidgets driver in the Mac's Security & Privacy settings.
Driver is blocked by system (MacOS)
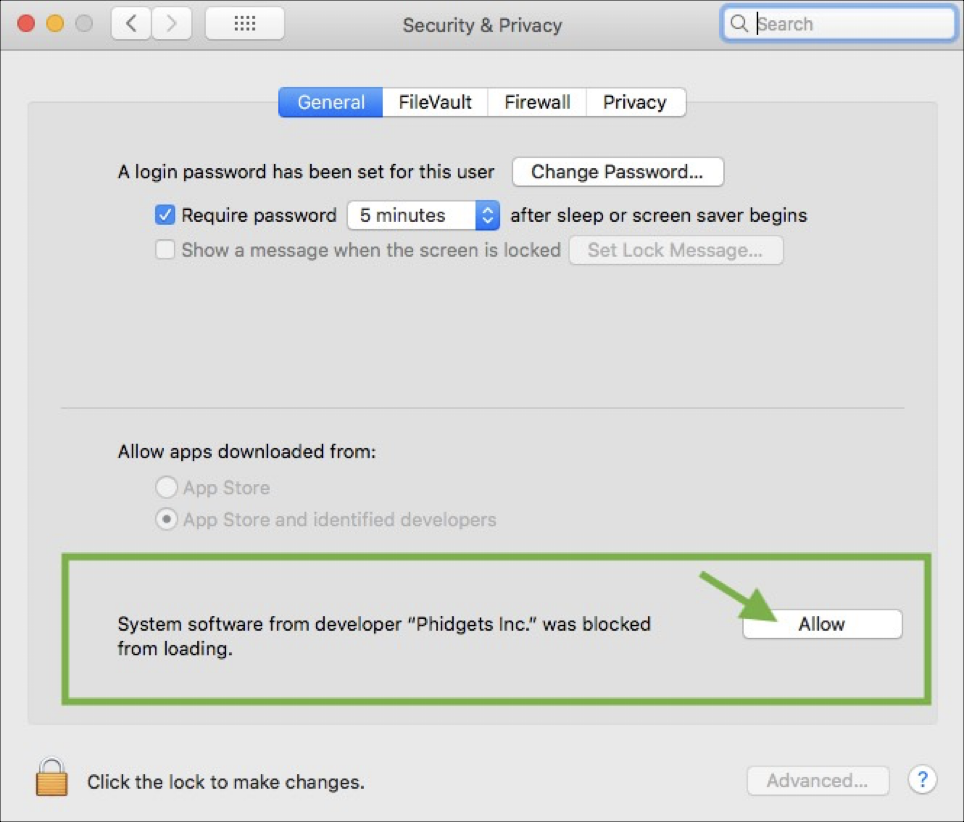
If you are on MacOS 10.13+, the Phidgets driver needs to be enabled within the Mac's security settings.
- Close the Roasting Intelligence and other temperature logging programs (e.g. Phidgets control panel) that might access the Phidgets.
- Go to
 > System Preferences > Security & Privacy.
 - Enable the software from Phidgets Inc. by clicking the Allow-button.
- Disconnect the Phidgets from the computer and reconnect it.
- Open the Roasting Intelligence (RI).
Note to macOS 11 Users:
If you're having issues with the regular installer, try installing and running the Standalone Control Panel, which uses a driver extension instead of a kernel extension.
Source: https://www.phidgets.com/docs/OS_-_macOS#Quick_Downloads
Another temperature logging program is running
The Phidgets can only communicate with one software at a time.
- Check if there is another temperature logging program running that accesses the Phidgets such as Artisan or Phidgets Control Panel.
- Close all programs and restart Roasting Intelligence (RI) only.
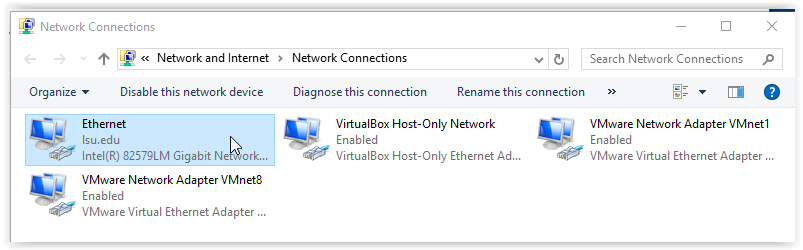
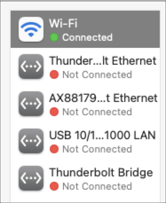
Network Connection
If your roast machine is connected to your computer via a network cable. Roasting Intelligence (RI) communicates with the roast machine via the IP address.
Connection issues due to the following reasons are likely:
No static IP address set up
If your roast machine is connected directly to the computer, you need to set a static IP address within the computer's network settings.
The following steps do not apply when the roast machine is connected to the network router directly.
The static IP address helps your PC to find the roast machine and is crucial if the roaster is connected directly to the PC.
To set up a static IP address, please refer to the Network setup section of your machine manual or refer to our generic guide on how to set up a static IP address.
Static IP address set incorrectly
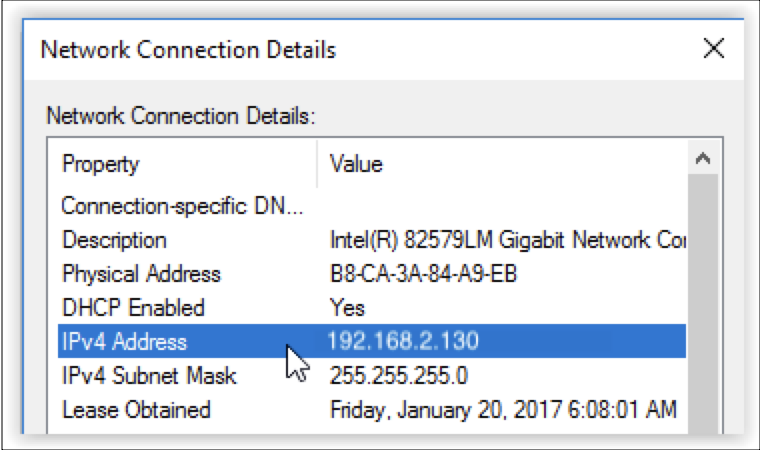
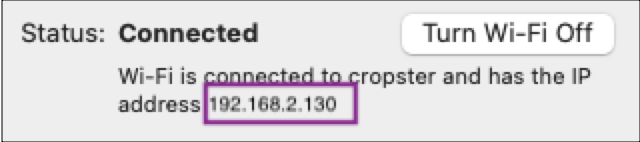
The IP-address of your roaster consists of four number blocks that can reach from 0 to 255, e.g. 192.168.2.180.
The static IP settings must follow a pattern:
- The first three number blocks of the static IP address need to match the roast machine's IP.
- The last number block must not match the roast machine's IP.
💡We usually use 42. - The subnet mask is always 255.255.255.0
If your roast machine's IP-address is 192.168.2.180 use the following IP settings:
- IP Address: 192.168.2.42
- Subnet mask: 255.255.255.0
- Open RI and navigate to Account > Preferences > Machine.
- Click the Gear icon to open the IP settings.
- Remember the IP address.
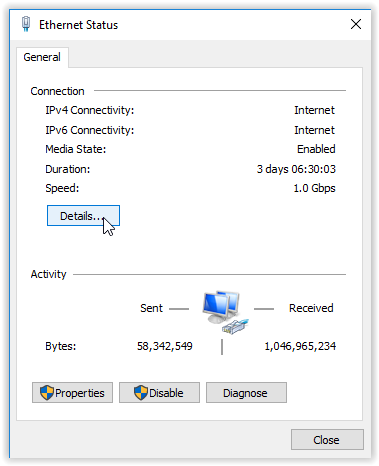
- Open the Network settings where you set the static IP address.
- Check if the static IP address and the subnet mask match the pattern outlined above.
- If not, revise the static IP address settings and restart RI.
Roaster's IP address is not the default
Depending on the machine manufacturer, your roast machine has a default IP address assigned. This is usually the IP address outlined in the machine setup manual.
In some cases, the roast machine's IP address differs from the default.
To find out the IP address assigned to your roaster (differs depending on the machine model):
- Look for an IP address in the network settings on your roast machine's display
- Closely watch the boot up screen when you switch on the roast machine (the IP address might shortly appear)
- Reach out to the machine manufacturer or seller
If you confirmed the IP address of your roaster is not the same as we outline in our manuals follow the steps below:
- Open RI and navigate to Account > Preferences > Machine.
- Click the Gear icon next to Bean temperature to open the IP settings.
- Replace the IP address by the specific IP address for your roast machine.
- If the roast machine is connected to the PC directly, you need to adjust the static IP address by the pattern outlined below:
- The first three number blocks of the static IP address need to match the roast machine's IP.
- The last number block must not match the roast machine's IP.
💡 We usually use 42. - The subnet mask is always 255.255.255.0
If your roast machine's IP-address is 192.168.2.180 use the following IP settings:
- IP Address: 192.168.2.42
- Subnet mask: 255.255.255.0
Network conflict
This applies if your your roast machine is connected directly to the computer or a non DHCP capable routing device.
If another connection (most commonly the Wifi connection) in the local network uses the same IP subnet as your roast machine, RI won't be able to read the temperatures from the roaster at all or the temperatures flash.
If the first three blocks of the IP address is matching the IP address of the roast machine, you face an IP conflict.
If the first three blocks of the IP address is matching the IP address of the roast machine, you face an IP conflict.
To eliminate the conflict, please reach out to your network administrator to change the IP address of the conflicting IP address.
To work around the issue:
- Connect your roast machine to the DHCP capable router and remove the static IP address.
- Eliminate the conflicting IP address by e.g. temporarily turning off the wifi connection, changing to different network or connecting via a mobile hotspot.
USB Connection (serial converter)
If your roast machine is connected to your computer via a USB cable, the connection issue can be caused by the following reasons:
Wrong serial port selected in RI settings
When connecting the machine, all available serial ports show up in RI settings.
If you are unsure which serial port option is referring to your roast machine, follow the steps below:
- Open RI and navigate to Account > Preferences > Machine.
- Click the Gear icon next to Bean temperature to open the connector settings.
- If you are not sure which port is referring to your roast machine, disconnect the roast machine and click the Update button and reconnect the roast machine and click the Update button again. If a new option appears, this is the one referring to the roast machine.
- Select the correct serial port and save your changes.
If that does not give you a reading, try all available options before moving on to the next section of this manual.
USB to serial converter not recognized
The most common serial drivers may already be pre-installed on your computer or install automatically when connecting the USB port. Certain devices require a manual installation of the driver.
The driver must correspond to the chip inside the device. You will need to identify the chip and locate the driver on the internet.
To find out what driver is required, try the following:
- Check the roast machine's manual or reach out to manufacturer for the recommended driver.
- Open the control tower of your roast machine and try to get to the backside of the USB port. Look for the serial converter and check if there is a label that provides a reference number. Look for the "reference number + serial driver" on the internet.
- Take a picture of the backside of the USB port inside the control tower and reach out to support team for help.
Your opinion matters. If you have further questions, feedback, or concerns, please feel free to reach out by submitting a support ticket directly from support.cropster.com.
