
In this article you will learn supported battery types, and the procedure to replace the battery for your AmbientSensor.
The AmbientSensor battery
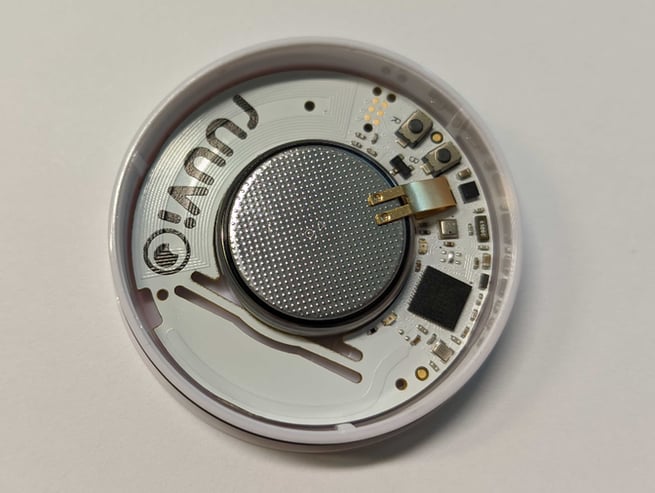
The battery will last approximately 2 - 3 years, but can go up to 4 years, depending on the use case. The correct battery type is the commonly available CR2477, with the operating range from -20°C to +70°C.
Hint: If extra operating range is necessary, a custom CR2477T battery can be ordered directly from Ruuvi, with the extended operating range from -40°C to +85°C.
Replacing the battery
-
Remove the AmbientSensor lid.
 You can pry it open with a nail or a small flathead screwdriver by utilising the two indentations on the side.
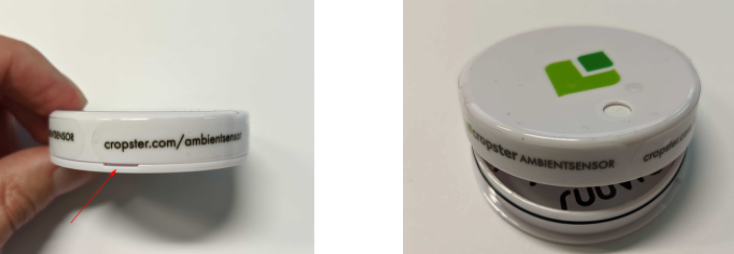
-
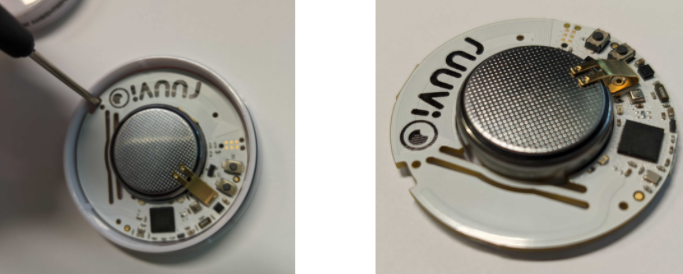
Use a small flathead screwdriver to gently pry the printed control board out of the case.
-
Use your thumb to push the battery out.
Caution: Make sure not to bend the contacts (in gold) while pushing the battery.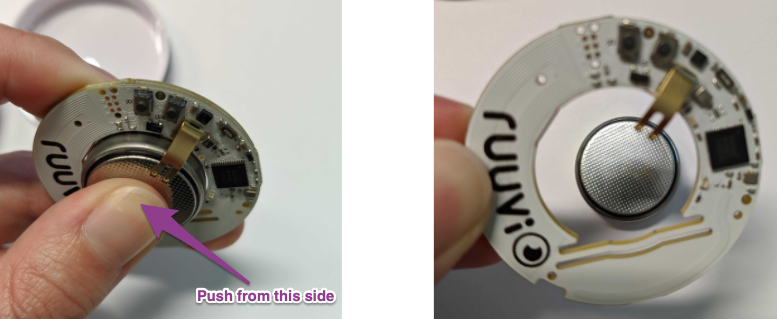
-
Push the replacement battery (CR2477) in from the other side. Push until the battery is almost flush with the case, as seen in the second picture below (right-hand side).
We recommend that you use two hands for extra precision.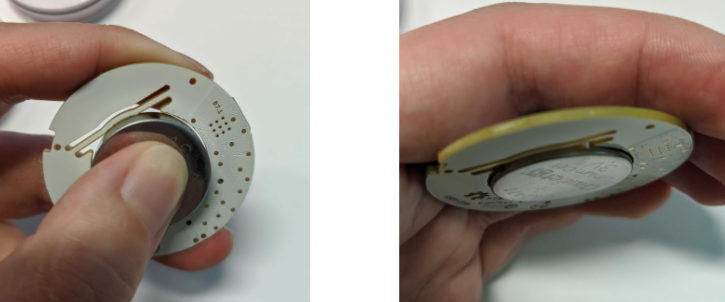
-
Push the printed control board back into the case and then close the lid again.
Congratulations! Your AmbientSensor is ready for use!
Thanks for being a Cropster customer! If you have feedback, questions, or concerns, please feel free to reach out by submitting a support ticket directly from support.cropster.com.
We design and make alterations to our software based on user feedback, so we look forward to seeing what you have to say!